Watch an RV Brake Upgrade with New Axles & More
Share article
One of Lippert’s top technicians visited the home of Cory and his family at Wandering Weekends. Cory was very excited about what kind of upgrades could be made to the brakes, shocks, and other systems underneath his travel trailer using genuine Lippert parts.
We have to say, this is quite the RV brake upgrade! Changing from electric to hydraulic disc brakes. Installing new axles with a higher weight capacity. Adding Road Armor shock absorbing tandem axle equalizers and more.
Even if this is something you don’t think you’d try on your RV, it’s really fun to watch and learn!
RV Brake Upgrade and a Whole Lot More with Wandering Weekends
(click image above to play video)
Introduction
Cory: Welcome back, friends. So, today is a day we’ve been waiting on for a long time. You guys know that we’ve partnered with Lippert. Well, today we’ve got a huge upgrade from them and I’m super excited. We’re going to get new axles, new springs, disc brakes, on a lightweight travel trailer. We may be one of the only Imagines [Grand Design Imagine travel trailer] to have this upgrade. And maybe some shocks, we’ll talk about that later. Stay tuned.
Alright. So, the man with the mission today, this is Mel, he’s a mobile tech from Lippert, and he’s going to be most of this video. He’s the expert here, I’m just a YouTube guy, don’t ever listen to me, but this guy knows what he’s doing. Mel, I’m going to let you tell everyone, what are we doing today?
Mel: What we’re going to do is upgrade our axles and that to a disc brake, so we’re going to put in a hydraulic actuator, which will be controlled by the electronics on the truck which will engage the hydraulic brakes. We’re going to, basically, upgrade what we have right now from electric to hydraulic disc brakes.
Cory: Well, that’s exciting. I think we’re doing, so these are 3500 lbs. axles, I think we’re putting 4000 pounds?
Mel: 4000 lbs. axles, so they’ll be an upgrade on the weight capacity as well.
Cory: Cool. And, we wanted to do some shocks, maybe or maybe not? Explain to them why we may not be able to do that.
Mel: Potentially there could be some clearance issues. When you’re making tight turns, if you ever watch or can see a travel trailer or a fifth wheel, the axles will kind of move, the tires will roll a little bit.
Cory: And that’s normal?
Mel: That’s normal, right.
Cory: Some people freak out when that happens, but that’s normal.
Mel: Yeah, that’s all normal, but what can potentially happen is the inside edge of the tire could come in contact with the shock or the shock clip and potentially cause some problems later — wearing on the inside of the tire, blow-ups, things like that. So, we’d like to confirm all our measurements and our clearances before we install anything like that.
Cory: Now, see that’s something that, you know, some YouTuber like me, I wouldn’t even think about that. I would just say, “OK, it fits, let’s slap them on get out on the road,” and, the first corner I hit, it’s going to rub the shocks. So, yeah. We’re super excited. You ready to go?
Mel: Ready to do this.
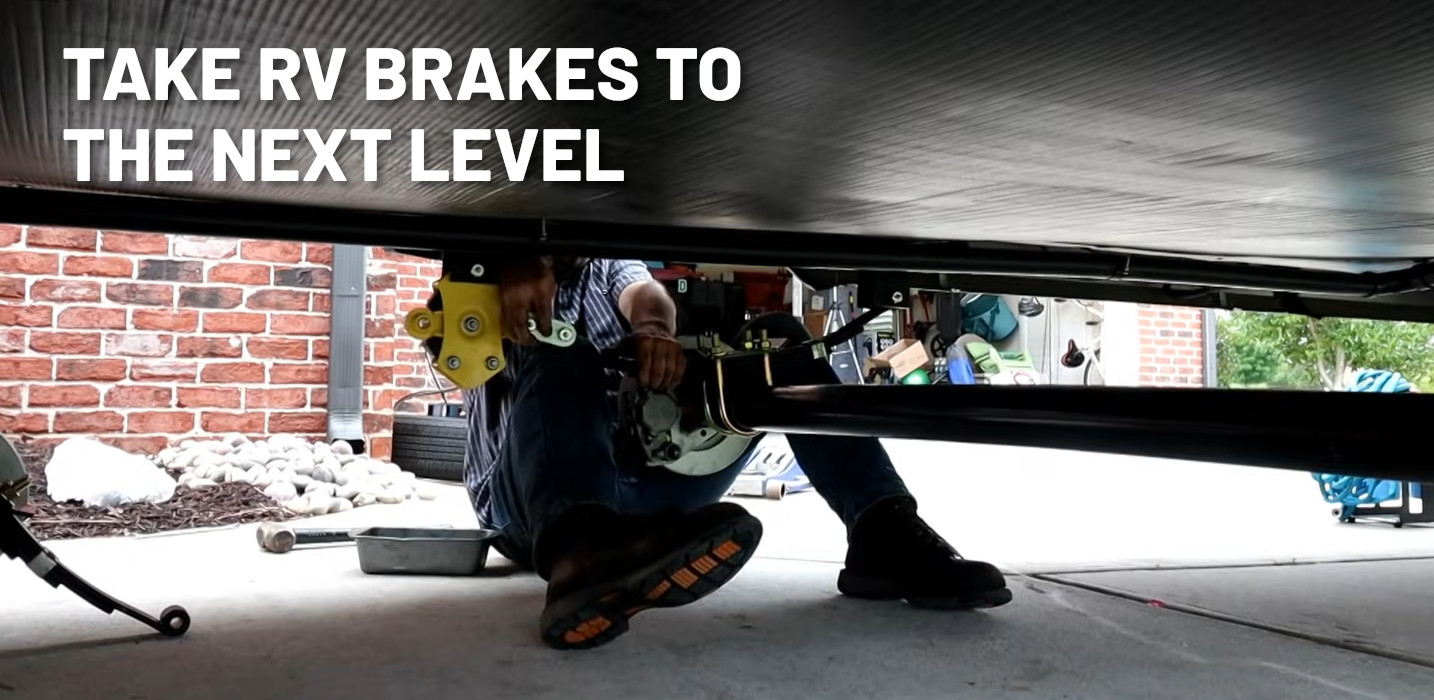
Jacking Up the RV to Work Underneath It
Cory: Let’s do it, man. Awesome. Cool. Now, obviously, the first thing we have to do is get this thing off the ground. Mel, tell us what we’re looking for when we place our jacks?
Mel: What we’re looking for is your bottom phalange or your beam, and this is the web of your beam. You want your jack to be in-line with the web of the beam on the bottom phalange. Otherwise that phalange will roll one way or the other.
Cory: Awesome. Alright, Mel, we’ve got her off the ground. We showed where wanted to place the jacks in the back, what about here in the front.
Mel: Yup. Well. What I do here - we’re looking for the contact point where the draw bars come in or the A-frame ties into the mainframe right here. I’ve got my jack stand underneath that on both sides. That’s just supporting everything, where the draw bar will…
All About RV Axles
Cory: OK, Mel, so let’s talk a little bit about the axles that are coming out. We don’t have any issues with these axles, we’re just doing an upgrade today, so talk about what we should look at if we’re checking our axles.
Mel: One of the things you want to look for is the camber or the crown and the tube. If you look, you can see that this tube is actually kind of bent in the center. That’s your camber. That’ll straighten out as you load it. You want to take a look at your springs, make sure your springs still have arc in them. Check and make sure, you don’t have any loose bolts or anything like that. But, yeah, these axles are still in good shape. Nothing that I see that needs looking at. I mean, they’re in good shape.
Cory: Can we pull them out and take a look at that camber you’re talking about?
Mel: Yeah, you’ll probably be able to see it a lot better.
Cory: Cool. OK, here’s what Mel’s talking about. And a lot of folks look under their chassis and see that their axles look like they’re frowning a little bit? Well, they’re actually supposed to do that. You can see the level doesn’t quite meet right now, and that’s what they’re supposed to do. Right, Mel?
Mel: Yeah, that’s built into the axle in the tube or the beam, and, generally, you’ll see that to between an eighth to a quarter of an inch.
Cory: OK.
Mel: That’s normal, and what happens is, once the axle is loaded on the outside, that’ll flatten out. It’s all designed for load.
Here’s Why You Need to Get Your RV Brakes Checked Once a Year
Cory: Cool. OK, so, hey, Mel just made a great discovery here, and I’m so glad he’s here. This one is on me. You know you’re supposed to have your brakes checked at least once a year. Right, Mel? Here’s a very big clue that I needed my brakes adjusted more than I may have known.
Mel: So, when you look at the heat signature on this drum, you can see that this side is doing more braking than this side, because of the color.
Cory: It’s very obvious.
Mel: You don’t see any of that rust or that bubbling of the paint.
Cory: Absolutely.
Mel: This brake should’ve been adjusted a little bit more so you had a little bit more braking on this side, to even out your braking.
Cory: And that’s on me, guys. So, make sure to get those brakes adjusted, and you can see why. I mean, it’s terribly obvious — that was getting hot.
Mel: Yeah.
Installing an RV Disc Brake Upgrade
Cory: OK, friends, let’s take a quick look at what we’re installing here. Mel, you kind of want to take it away?
Mel: What we got here is the disc brake upgrade. Got your rotor and everything, assembly, caliper and that. Going to have new springs. Now, the other thing that we’re looking at here is this tie-plate. You see this overhang here with the hole in it, that’s going to be for the shock.
Cory: If we can get them to fit.
Mel: Yep. If you already have a coach that does have shocks, you’ll see this plate, but you can upgrade to this [Tie Plate / Shock Mounting Plate] as well.
Cory: Yeah, that’s something you can just buy on its own [Heavy-Duty Shock Mount Kit], right?
Mel: Yeah, yeah, yeah.
Cory: OK, cool. And then we’ve already got the brass bushings in our springs, and we’ve got heavy duty shackles going in. This is looking fun.
Tips on Installing Road Armor™ Tandem Shock Absorbing Equalizer Kit
Cory: Here we go, installing the Road Armor. So brass liners in it - what do they call those? Liners, bushings?
Mel: Bushings. Brass bushings.
Cory: And they are wet bushings. Now tell us a little bit, Mel, why do you put the fitting on the inside? So, there’s a grease fitting. Let me show them right quick, obviously, you got a grease fitting right there. You know, your first intuition would be let’s put them to the outside, so I can get to them, but Mel actually has a really good reason for why you put them on the inside.
Mel: One is they’re easier to get at as far as greasing, but what I actually want you to be able to do is walk by your coach and inspect your axles and make sure that all of the nuts are still on all the axle bolts.
Cory: You also told me it kind of forces you to get under there and take a look.
Mel: Right, when you go to service them and grease them you’re actually looking a little bit more at the axle hanger and the frame and the springs and what have you.
Cory: That’s a great tip!
Tips on How to Hang an RV Axle
Cory: We’re about to hang this first axle, and Mel’s got some great tips on — especially if you’re doing this by yourself — how to hang these things. Because they’re a little bit heavy.
Mel: Yep, basically, if you’re working alone, what we’ll do is we’ll just pick up the one side, and I’m going to slip the bolt in — again with my greaser — on the inside, but I’m just slipping it in their enough. I’m not worried about getting it all lined up, because I’m going to let this one hang. Then, I’m going to go to the other side, and I’ll pick the other side up so they’re level, and the other bolt will go right through. Then, I can come over here and put this one through.
Cory: Nice, so we’re not torqueing anything.
Mel: Yeah.
Cory: You know, it’s just a nice and easy install. So, really, you don’t even have a jack under these things.
Mel: No, they’re not that bad. I mean, you can use a jack if you want to, but I just found it easier.
Cory: Yeah, seems pretty simple.
Installing Shocks on a Lightweight Travel Trailer
Cory: OK, friends, moving right along. We’re getting it mocked up right now. We’re not fully installed right now, and it’s showing you how we’re sitting right here. Now you’ll notice that Mel has the jack on an axle, there’s no weight on that axle, so don’t flip out.
Now, let’s go over here and talk to Mel for a second. This is kind of a new thing for all of us, really, for Lippert and for us — lighter-weight travel trailer, putting shocks on it. We’ve got to make sure it’s got clearances, right? It’s kind of why we’re mocking it up and putting the tires on it temporarily.
Mel: Exactly. What we’re doing is we’re just kind of put our tires and everything on. There’s no real weight on the jack or anything, but we want to know exactly where our tires are going to be located in relation to the side of the beam, so we can confirm that we have clearance for our shocks.
Cory: Great, just like we mentioned in the intro, you camber back and forth a little bit when you’re taking tight turns, and Mel knows his stuff. He’s smart enough to look for those things where I would not be. That’s why he’s doing this, and I’m not. So, stay tuned guys, we’re getting it rocking and rolling. It’s looking good.
Can You Install Shocks on a Grand Design Imagine Travel Trailer?
Cory: So from the get go, Lippert’s been very clear, we may or may not be able to do the shocks, and it actually doesn’t look like we can do the shocks. Mel, you want to explain a little bit why?
Mel: Yeah, basically, what we have is the height of this beam is not tall enough. It’s a six inch beam, and what it does is the shock doesn’t have the clearance to function properly.
Cory: Do its work, yeah.
Mel: Yeah, because it doesn’t, it won’t stand up high enough.
Cory: Yeah.
Mel: The shock should be between a 50- and a 60-degree angle.
Cory: Correct, and you guys were very clear about that. So, we were hoping to get them in, but it doesn’t look it’s going to work. Six-inch I-beam, lighter-weight travel trailer, you guys really don’t put shocks on lighter-weight trailers. This was kind of like, not a guinea pig thing, but it was, “Hey, let’s see if we can do it.”
Mel: Yeah.
Cory: So just a real-world situation, just not going to be able to do it on this particular trailer.
Mel: Yep.
Cory: Alright man.
Advice on Installing Hydraulic Lines for RV Brakes?
Cory: OK, friends, so obviously we’re going from electric brakes to hydraulic brakes and there’s never been hydraulic lines run to this rig. So, we got to find a place to put them, and Mel’s going to give us some pointers on how to place your hydraulic lines for your brakes.
Mel: So, what I’m doing now is I’ve got my flexible hose into the caliper, and what I want to do is I want to find an optimum location for this so that, as this travels up and down my line, it doesn’t rub the tire or get pinched in any way.
Cory: For obvious reasons.
Mel: Because once you pinch this line and puncture it, then you’re going to have a no brake issue, because there’s going to be hydraulic, you won’t have the fluid in there. But, that’s what we’re trying to do. As far as right now, we’re just mocking it up to get a good location for where to put the fitting.
Cory: We’ll show you guys when it’s all finished.
Double-checking the Hydraulic Lines with the Tires on the RV?
Cory: OK, so what Mel is doing right now is putting the tires on before he makes the very final decision about where to put the brake line. For obvious reasons. I mean, the - you’ve got to know where, exactly where the tire’s going to be, to make sure it’s not rubbing on the lines, and we want to get these tires on, put full weight on them, and let me tell you - it looks cool with these brakes. Looking good. Let’s keep it going.
How to Uncoil New RV Brake Lines?
Cory: OK friends, day two of the huge upgrade from Lippert. Generally speaking — so yesterday, Mel took a significant amount of time trying to see if we could make those shocks work, right?
Mel: Yeah.
Cory: So generally speaking how long would this upgrade take?
Mel: Generally speaking this would take a day, you know.
Cory: About a day. So, we’re filming a YouTube video and, like I said, he tried to mock up the shocks anyway. You spent a good amount of time just seeing if there’s any way that we could do that, and it just wasn’t happening. So, about a day this project would normally take. We’re on to the brake lines. Mel’s got some good tips for how to uncoil your brake lines here, so I’m going to give it to him. Take it away, Mel.
Mel: So, when you get the kit it’s going to come coiled up. All of your brake lines will come in coiled up. Just find you a nice, flat, smooth spot and just roll this stuff out, and instead of trying to unkink it or roll it out, if you just find a nice flat spot like that. It’s much easier, and again you can kind of use your body here to just kind of spread it out a little bit more to kind of get it good. It isn’t going to be perfect, but if you try to just uncoil it, the chances of kinking it are very good.
Cory: Exactly. And we’re battling hurricanes — or Tropical Storm Sally right now, so that’s the kid’s toys.
Advice on Greasing RV Shackles and Wet Bolts?
Cory: I used to have an old jeep and worked on it a good bit, and I had a crawler [creeper], but now this is my crawler, I knew I shouldn’t have gotten rid of it.
Before we get these brake line going, Mel’s going to hit these wet bolts with a little bit of grease, and he’s got a good pointer here for you. Go ahead, Mel.
Mel: Yeah, so what we want to do is, you know, this being a brand-new setup, I’m just going to put two pumps in this, that’s plenty of grease. You don’t want your grease squirting out everywhere. Now, when you go back and have to grease your shackles again, all you should have to do is put one pump of grease in it. You don’t need to have grease spewing out everywhere because all that’s going to do is collect dirt and debris.
Cory: Nice. And so, if you guys don’t know what these are, we haven’t explained them to you. These are wet bolts. Most manufacturers just put regular bolts in here with plastic bushings. And these are wet bolts, obviously they’re greased and they have, what are they? Bronze bushings?
Mel: Bronze bushings.
Cory: Bronze bushings. So definitely a huge upgrade here. Let’s get to those brake lines.
Mounting Flexible RV Brake Lines to the Caliper
Cory: I’m going to let Mel take this one. He’s already done some significant work here, and it looks really clean, and he’s even going to clean it up some more. One thing he did want me to show you, while I’m here, is he’s made sure to mark-up where your cross members are. Because he’s going to do some additional mounting. But Mel, go ahead and take it away, man.
Mel: So, what I did here was I mounted my flexible brake lines that go to the caliper, then I mounted my bracket. Now one thing that you want to keep in mind here is, I put this little S-bend, and it doesn’t have to be perfect. You can work it to whatever works best to your situation. But, the reason I put this in here is to keep any chances of contact from these bolts coming up and hitting the line should anything happen. So, we want to keep those as clear as possible. And I’ve done that on all four lines.
Cory: This is something I would not have thought of. I would’ve just ran straight up. Every single brake caliper, he’s done that on. So that is awesome.
How to Mark the Cross Members on the Underbelly of Your RV
Cory: You want to tell them how we marked up the cross members?
Mel: Yeah, basically what I did was I just dropped some underbelly, so I could see it. I only had to take a couple of bolts loose, and I could see right in here. And then, I reached back to find that cross member, and I was pushing on it. I just marked it. I marked the edges of it in the center. So, what I’ll do is I’ll put a P-clamp on here like that. To hold those down.
Cory: Yeah, so it’s going to ride tight to the underbelly.
Mel: Yep.
Cory: Nice, man. Alright, let’s keep it going. So here, you can see, I guess this is the next step.
Mel: Yep, this is going to be my line that comes from the actuator up front.
Cory: OK, so from here we’re right in front axle, right now. And from here we’re going to run the line all the way up. You see he’s got some underbelly out. He’s been running some wire. We’re going to show that to you in just second. But yeah, let’s keep going.
Explaining the RV Brake Actuator
Cory: OK, you’re going to hear some umbrella noise here, I’m trying to keep this lens dry. Mel, we’re talking about the actuator now, we just showed you guys where the line is in front of the front tire at this point. The line has to run up to an actuator. You want to tell them what the actuator does real quick?
Mel: Yeah, basically the actuator is what operates off of your brake pedal. The voltage that’s put out through your electric brake will activate the hydraulic actuator which will engage the brakes.
Cory: So, basically, it’s going to know your gain, and it’s going to react off of it.
Mel: Yep. It works off of all that.
Cory: So, let me go in here and show you. While I’m doing this, Mel, why don’t you tell them why you picked this location?
Mel: What I was looking for was some place that’s going to be out of the way, you know, not a lot of stuff’s going to be hitting on it or anything like that as you’re loading and unloading gear.
Cory: That’s perfect. And I’m not going to have to access that very rarely, right?
Mel: Yeah, rarely will you ever have to.
Cory: Once a year, maybe?
Mel: Yeah. Just to check your level.
Cory: Cool, cool.
Checking Hydraulic RV Brakes for Leaks
Cory: OK, guys. So obviously once you run the lines, you get everything set up, you’ve got to bleed the brakes, but first you’ve got to check for leaks, and Mel’s got a great way to do that. Go ahead, man.
Mel: Right. What I’m doing right now is I’m just using our brakeaway switch. When I pull that, it’s energizing. I don’t know if you can hear that or not? But, it’s energizing the actuator, and it’s going to build pressure, and then you can just slip that back in there, and it shuts right off.
Cory: OK, and you guys could hear that, I’m sure, you could hear that pump. Once that pump started to really work, that’s when we shut it off.
Mel: Right.
Cory: Now we go check for leaks?
Mel: Yep.
Cory: Alright, cool man. So, we checked for leaks the first time. We did have a couple.
Mel: And found two leaks.
Cory: That’s right.
Mel: And a possible third. One was a fitting I didn’t have tightened up and the other one just luck of the draw.
Cory: That’s why we check. I told Mel, if he told me I didn’t have any leaks, I’d be like, whoo boy, I’m going to have to find them.
Mel: Yep.
Cory: Because you’re always going to have them, pretty much.
Mel: You’re always going to find something. There’s a lot of little things that could come back.
Cory: Absolutely. So grateful for Mel, man. He is knocking this out of the park.
How to Bleed RV Brakes Lines
Cory: OK, friends, so we put some pressure on the lines, we checked for leaks, I keep saying ‘we,’ Mel did this stuff, OK? So, Mel checked for leaks. We had one leak, and we had one bad fitting, right?
Mel: We had a bad fitting, yep.
Cory: So, that wasn’t on Mel, that was actually one of the brass rings had a pinhole leak, so that’s one huge reason to check for leaks. And then bleeding the brakes. You want to take that one?
Mel: Yeah. So, basically what I did was, you have to have a battery for the brakeaway and power the actuator, so what I actually use when I do them is pull the brakeaway switch and that will power your actuator. Let it build a little pressure, plug it back in, wait, then you can go back to the back. And, if you have somebody else that helps, they can pull that brakeaway switch for you, and you can bleed them. But, that is a way to do it. It’s okay because you’re not leaving that run for a very long time. It’s just a simpler way to do it — bleeding the brakes without having to hook your truck and everything.
Cory: And like, if you’ve ever bled brakes. I’ve done it a bunch. You’ve got somebody in the truck pumping the brakes until it gets all the air out. So, basically, he’s using that actuator instead of pumping the brakes. You don’t have to hook the truck up. So that’s awesome. I mean, I wouldn’t have thought about that.
Mel: Yeah.
Cory: That’s why Mel’s here, right?
Mel: It is. It’s a great way to do it. You can listen to that actuator as it builds pressure, and then you can unplug it. You’ll totally hear the difference as it builds pressure and you get the air out of the lines.
Burnishing New RV Brakes
Cory: Awesome, so another thing with this upgrade, I’m going to have to break these brakes in. That’s hard to say. Anytime you do a brake job, especially ones with new rotors and new pads, they’re going to be spongy at first. This is for cars, RVs, anything. They’re going to be spongy at first. So, what do you think? Probably 90 miles, 100 miles, should be good?
Mel: And there’s a procedure, you can go to our website and that tells you how to burnish brakes and stuff.
Cory: There you go. Cool, cool. Well, Mel, thank you so much, man.
Mel: It was a pleasure.
Cory: It has been a pleasure. We’ll do an update vid with this, after we tow a good bit with it. I’ll let you know. We are so excited and thank you Lippert. We’re very grateful. This is awesome. I hope this is helpful guys, and if it was, consider subscribing. See ya.
Upgrade Your RV Brakes, Axles, and more with Lippert

Road Armor™ Shock Absorbing Equalizer - Tandem Axle Kit, 3,500 to 8,000 lbs
How does it work? The patent pending design incorporates a single pivoting arm that is permanently engaged with the trailer axles’ leaf springs. This allows Road Armor to constantly absorb and dampen road shock whether it is coming from the leading or trailing spring, utilizing the trailer’s natural motion. Once road shock and vibrations are encountered, they are transferred to one of two customized durometer rubber shock absorbers.

Lippert Axle, Brake and Suspension Parts and Upgrades
Every one of our travel trailer, fifth-wheel, horse trailer and utility trailer axle, brake and suspension enhancement products boasts an impressive list of standard features.
Take a look at what we have to offer, then contact a local dealer here to assist you with upgrading your RV: Lippert Dealer Locator
