The Ultimate Trailer Wiring Guide for Preparing to Tow
Share article
Trailer wiring may seem like a complicated topic, but it's crucial for towing safely, whether you're an avid camper or boater, or if you frequently transport heavy loads. Regardless, knowing the ins and outs of trailer wiring is essential. In this comprehensive guide, we will cover everything that you need to understand about trailer wiring, from its basic definition and purpose to connector types, wire colors and best practices.
In this post, we will also provide a step-by-step guideline for installing trailer wiring to help you through the process of installing trailer wiring yourself.
CURT has trailer wiring options for all different types of towing setups and needs. We've been known as a leader in towing products for two decades and for this reason, we're happy to explain everything about trailer wiring that is necessary for you to know before you tow.
Let's get started.
What is Trailer Wiring?

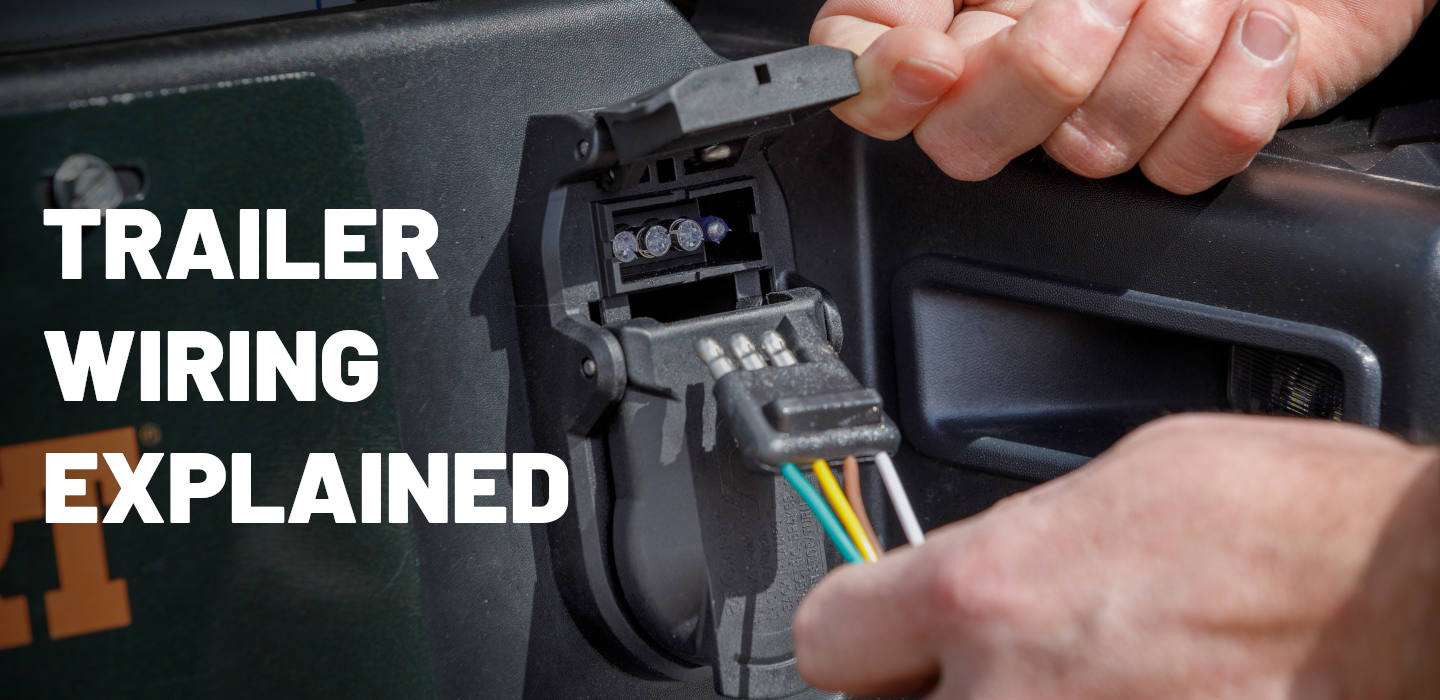
Trailer wiring describes the electrical harness that serves the various functions needed for towing a trailer. Simply put, it's the "nervous system" of your trailer, controlling lights, brakes and other vital components.
Trailer wiring systems vary from the most basic types of taillight converter kits to fully powered RV 7-blade plugs, from more basic uses such as towing a small utility trailer or a jet ski to towing a 30-foot 5th wheel travel trailer.
Regardless of what you're towing, trailer wiring is essential. Without it you cannot tow safely or legally. It is important to understand trailing wiring so that you know what type of trailer wiring to buy or how to repair your trailer wiring in the event a fault occurs.
It's also important to understand your trailer wiring so that if you decide to buy a towing accessory, such as a trailer brake controller or sway controller, you know it is compatible with your setup.
To clear up any confusion, however, trailer wiring is only the wiring harness itself and does not include secondary accessories that may be plugged or spliced into your trailer wiring harness.
Now that we're ready, let's dive into the different uses of trailer wiring.
Trailer Wiring Parts & How They're Used
Trailer wiring comes in numerous different configuration types and styles that range from the most basic 4-flat pin connection to more advanced 7-way blade connections. Each serves different purposes and features different parts and has different colors and numbers of wires.
Below, we'll explain what the parts of trailer wiring are and what they are used for.
Trailer Brake Lights
Trailer brake lights are vital for signaling to drivers behind you that you're slowing down or stopping. They also serve the purpose of allowing drivers to see the back of your trailer as they approach at nighttime. Driving with brake lights is essential and driving without them can be dangerous.
Turn Signals
Turn signals indicate your directional intentions to other drivers. When traveling with a trailer, making turns or lane changes can be more difficult and it's important that other drivers are aware of your intentions long before you begin to maneuver. This prevents accidents and mishaps!
Running Lights
Running lights provide visibility in low-light conditions and function similarly to brake lights although they are not quite as bright. Running lights allow other drivers to know where your trailer begins and prevents accidents by providing visibility.
Reverse Lights
Reverse Lights signal that you're backing up and are a crucial feature for safety when at a standstill. Whether that be in a parking lot or at a boat dock, the reverse lights allow people and vehicles behind the trailer to know that you intend to move in reverse.
Trailer Brake Wiring
Electric trailer brake wiring is essential if you are towing a large or heavy trailer. If your trailer is equipped with electric brakes, be sure that the trailer wiring is compatible and functions in sync with your vehicle's braking system.
Auxiliary Power
Auxiliary power or accessories wiring works to power additional accessories such as power jacks, leveling systems, trailer sway controllers and even lighting and travel trailer power when in tow.
Next up, we will discuss trailer wiring colors and explain which wires work for each function.
Trailer Wiring Colors & What They Correspond To
There are numerous configurations of trailer wiring and each type has differing colors that correspond to different uses. However, generally, there are some commonalities. First, we will start with the more general uses for each color and then move on to the different color uses for different plug types. Follow along below.

Brown, White, Yellow & Green — The Most Common Colors
These are always the same on 4-way flat, 4-way round, 5-way flat, 6-way round, 6-way square, 7-way round and 7-way RV blade SAE trailer wiring harnesses, however, please note that the traditional 7-way RV blade style is different than the others.
Brown — Brown wires are used for taillights and side marker lights.
White — is the ground wire. It's essential for completing the electrical circuit.
Yellow — is designated for the left turn signal and left brake light.
Green — is primarily used for the right turn signal and right brake light.
Blue, Black, Red, Orange & Grey — Used for Other Purposes
Blue — is used for electric trailer brakes, helping your trailer stop safely and in unison with your towing vehicle, with the exception of the 5-way flat plug which uses blue for reverse lights.
Black — is only used on three trailer wiring types and is used for providing constant 12V power to the trailer on the traditional 7-way RV blade connectors and 6-way round connections. Only on 7-way round connectors is black used for reverse lights.
Red — is only used on three trailer wiring types and is used for providing left turn signal and brakes on traditional 7-way RV blade fittings, are used for auxiliary power on 7-way round fittings and is used for +12V power on 6-way square fittings.
Orange — is used only on one trailer wiring type. On 7-way RV blade SAE configurations, the orange wire is used for +12V power.
Grey — is used only on one trailer wiring type. On 7-way RV blade SAE configurations, the grey wire is used for brake lights only.
Now that we've talked wire colors, we can dive into the different plug types in further detail.
Types of Trailer Wiring Harnesses & Differing Plug Types
Now that we've discussed the wire colors and uses, you may be wondering why there are so many different trailer wiring types, each with distinctly styled connectors.
This is intentional because there are so many different types of trailers and towing scenarios, there are differing types of trailer wiring, each with its own set of functionalities and uses.
Follow along as we explain what they're all used for, from the most basic to the most advanced of towing applications.
4-Pin Wiring
In a 4-way setup, you'll find white (ground), brown (taillights / running lights), yellow (left turn/brake) and green (right turn/brake).
4-Wire Colors & Their Functions
- Green: Right turn / brakes
- Yellow: Left turn / brakes
- Brown: Taillights
- White: Ground
4-Way Flat Configuration

4-Way Round Configuration

Flat vs. Round
4-way connectors come in either flat or round configurations. The flat style is more common for smaller trailers, while round connectors are often used for industrial applications.
4-Wire Trailer

5-Pin Wiring
5-way wiring has the same functions as 4-way wiring -- white (ground), brown (taillights / running lights), yellow (left turn/brake) and green (right turn/brake) -- but it also adds a blue wire for electric trailer brakes.
5-Wire Colors & Their Functions
- Blue: Trailer brakes
- Green: Right turn / brakes
- Yellow: Left turn / brakes
- Brown: Taillights
- White: Ground
5-Way Flat Configuration

5-Wire Trailer

6-Way Round


• Blue Trailer Brakes
• Black +12 volt
• Green Right turn / brakes
• Yellow Left turn / brakes
• Brown Taillights
○ White Ground
Round vs. Square
6-way connectors come in round and square configurations. The square style is commonly used on popup campers, providing a replacement for existing wiring.
Wire Colors and Their Functions
A 6-way connector includes all the wires mentioned above, plus a black wire for +12V auxiliary power.
Trailer Diagram
See the diagram below to understand better how 6-way round harnesses are used.

7-Way Round

• Red Auxillary Power
• Blue Trailer Brakes
• Black +12 volt
• Green Right turn / brakes
• Yellow Left turn / brakes
• Brown Taillights
○ White Ground
Wire Colors and Their Functions
The 7-way adds another wire, typically red for auxiliary power and then also uses black for the reverse lights, instead of +12V power.
Trailer Diagram
See the diagram below to understand better how 7-way round harnesses are used.

7-Way RV Blade — SAE Configuration

• Grey Reverse Lights
• Blue Trailer Brakes
• Orange +12 volt
• Green Right turn / brakes
• Yellow Left turn / brakes
• Brown Taillights
○ White Ground
Wire Colors and Their Functions
The 7-way RV blade SAE J2863 configuration uses similar wiring as the 7-way round style, although there are 2 wire colors that are used for different functions. The grey wire is used for the reverse lights and an orange wire for the +12V power. The remaining wires are the same.
Be careful not to confuse the SAE J2863 configuration of a 7-way RV blade plug with the traditional version, which we will cover next.
Trailer Diagram
See the diagram below to understand better how the SAE 7-way RV blade harness is used.

7-Way RV Blade – Traditional Configuration

• Red Auxillary Power
• Blue Trailer Brakes
• Black +12 volt
• Green Taillights
• Yellow Reverse Lights
• Brown Right Turn / Brakes
○ White Ground
Wire Colors and Their Functions
The 7-way RV blade traditional configuration is one of the most popular wiring configurations, particularly against the SAE J2863 configuration.
The wire colors correspond to very different functions over all other trailer wiring harness types, however. Be careful not to confuse your wire colors with another wiring type, as the traditional 7-way RV blade is distinctly different from other plug and wiring harnesses.
Trailer Diagram
See the diagram below to understand better how the traditional 7-way RV blade harness is used.

Best Practices for Maintaining Your Trailer Wiring

Ensuring the proper function and longevity of your trailer wiring is not just about installation but also about ongoing maintenance. Here are some best practices that will help to keep your trailer wiring set up working as intended and last for many years of towing.
Cap the Connectors When Not in Use — Exposure to the elements can cause corrosion, affecting your trailer wiring's functionality. Use caps or protective covers when connectors are not in use.
Avoid Pinching the Harness — Whether it's in the trunk, truck bed gate, tongue jack, or under the coupler, make sure your wiring harness isn't pinched, which could cause it to fray or break over time.
Store the Harness Out of the Way — Make use of hitch brackets or other storage solutions to ensure the harness isn't dragging on the ground or getting caught in moving parts.
Doublecheck the Connection Before Towing — A quick check to ensure that all lights and electrical systems are working can save you from potential road hazards.
Make Sure the Harness Won’t Drag on the Ground — A dragging harness is prone to wear and tear. Make sure it's securely fastened.
Provide Enough Slack for Sharper Turns: Lack of slack can cause the wiring to disconnect or snap during a sharp turn, so make sure there's enough play in the harness.
Regularly Inspect for Wear and Tear — Check for frayed wires, corrosion, or any other visible damage. Replace any compromised parts immediately.
Use Dielectric Grease — This grease can be applied to electrical connectors to help prevent corrosion.
Conduct a Yearly Professional Check: Having a professional evaluate your trailer wiring system can identify potential issues before they become problems.
The Four Different Scenarios to Consider Prior to Wiring Your Vehicle
When it comes time to pick out a style of trailer wiring harness for your truck or SUV, there are four basic options or scenarios to consider.
Read along closely to know which circumstance pertains to you.
1 - You Have a Towing Package with Trailer Wiring Already Installed
If your vehicle came with a towing package, then you likely have the necessary trailer wiring already in place.
In this case, all you might need is an adapter to connect to the trailer.
Double check your vehicle to see if you can locate and find the towing plug which is often located around the bumper of the vehicle, if not mounted on or under the bumper itself.
In the event that your vehicle wiring does not match the trailer that you plan to tow, a wiring plug adapter is a quick, easy way to make the two differing wiring configurations compatible.

2 - You Have a Towing Package with OEM Sockets
In this case, you'll need a custom wiring connector to plug into the OEM (Original Equipment Manufacturer) sockets to provide a standard trailer wiring connector.
Visually locate the socket and inspect the connection type to discover which type of trailer wiring harness you need, which can be determined by looking at the differing plug styles above.
A custom wiring harness is ideal since it is specifically made for your vehicle.
3 - You Have No Towing Package or No OEM Sockets
If your vehicle doesn't have a towing package or OEM sockets, you'll need a custom wiring harness that "T"s into your taillight connections.
Look at your trailer wiring harness near the tongue or coupler and see what type of wiring connectors are installed on the trailer. Use the diagrams above to determine which plug connector type you have.
A custom wiring harness is again ideal for this circumstance.
4 - No Towing Package, No OEM Sockets and No Custom Wiring Harness Available
In this scenario, a taillight converter is needed, which splices into your vehicle's existing wiring.
In this situation, you will need to wire in a harness using your taillight. CURT makes taillight converter kits specifically for this situation.
A taillight converter is the best choice for the circumstance.
Introduction to Wiring or Rewiring a Trailer
Occasionally you may need to rewire your trailer — This is common when the wiring is old, rotted out or not functional. It may also be the case that your vehicle has no trailer wiring. In this case, you will steep need to wire up a custom harness before you can tow. Wiring or rewiring your trailer may seem daunting, but it's actually easier than you may expect. This is especially true if you follow the systematic approach below.
Rewiring your trailer involves disconnecting the old wires, routing new wires, connecting them to the corresponding components and finally, testing the system to make sure it's functioning correctly.
Step-by-Step List for Rewiring a Trailer
Locate and Disconnect Old Wires — Remove the old wiring harness from your trailer, while being cautious to avoid damaging any lights or other components. Be careful to remove the old wires delicately to prevent shorting, grounding and damaging the wires that the harness may be spliced into. If your vehicle does not have existing wiring, simply skip this step.
Visually Inspect and Plan the Route — Before you start running new wires, plan where each wire will go, making sure to avoid any areas where they could get pinched or damaged. Make sure the wires are secure and tucked away underneath the vehicle and are not exposed to the elements, otherwise, you may damage the trailer wiring with daily driving.
Run New Wires — Begin running your new wires according to your plan. Make sure the wires are tucked away and are protected by a cable sleeve, also known as a wiring sheath, which is a plastic tube that allows the wires to stay protected from the elements and road debris.
Connect the Components — Once the wires are routed, connect them to the lights, brakes and any other components. Be sure that you understand which wires on your vehicle correspond to the different functions — the colors of the wires on the vehicle itself may not correspond to the functions of the wires for your trailer wiring setup. For example: your left turn signal wire may be green on your vehicle while the left turn wire on your trailer harness is likely to be yellow.
Ground Your System — Make sure to properly ground your wiring system. This part is essential. If the system is not grounded correctly your trailer wiring may not work. Furthermore, it may burn out or cause shorting with other electrical systems in your vehicle. Be sure to make sure your wiring is grounded well to the vehicle chassis or ground wire, depending on your trailer wiring setup.
Test the System — Before hitting the road, test all the lights and electrical components to ensure they're working as expected. Visually ensure that all the lights are functioning properly for their uses and that the lights are bright and vivid. If the trailer wiring is not installed correctly, the trailer or vehicle lights may appear to be delayed or dim when in use.
Secure Loose Wires — Use zip ties or wire loom to secure any loose wires, making sure they're away from moving parts or hot surfaces. Make sure the wires are protected in a cable sleeve or wiring sheath and are tucked away under the vehicle far from moving objects or the ground itself. Ideally, the wires should not be visible and should be hidden on both the vehicle and trailer.
Final Inspection — Conduct a final test to ensure everything is properly installed and secured. Make sure brake lights, running lights and turn signals are working properly on both the tow vehicle and the trailer itself. Do a test run and use your trailer lights for several miles while pulling your trailer and then retest all the lights before embarking on a longer trip with your trailer. This will ensure that there are no issues once you hit the road.
FAQ: Frequently Asked Questions About Trailer Wiring
Q: Do all trailers require the same type of wiring?
A: No, the type of trailer wiring required depends on what the trailer is equipped with. Basic trailers may only require a 4-way connector, whereas trailers with more features like electric brakes or auxiliary power may require a 7-way connector.
Q: How do I know which wire does what?
A: The color coding of wires is generally standardized, but it's always good to double-check with the manufacturer's guide or test each wire to ensure you are connecting it correctly.
Q: What if the wire colors on my vehicle and trailer don't match?
A: If the wire colors don't match, consult the manuals for each to determine the function of each wire. Use a circuit tester to identify the functions of your vehicle's wiring.
Q: Can I install trailer wiring myself?
A: Yes, installing trailer wiring can be a DIY project, but it requires some technical skill. If you are not comfortable with electrical work, it's best to consult a professional.
Q: What do I do if my trailer lights are not working?
A: If your trailer lights are not working, check for a loose connection, corroded terminals, or frayed wires. In some cases, the issue could be a blown fuse or a bad ground.
Q: Can I use an adapter to connect my vehicle's connector to my trailer's connector?
A: Yes, adapters are available that allow different types of connectors to be joined. However, ensure the adapter supports all the features of your trailer, such as electric brakes if your trailer is equipped with them.
Q: Is it essential to ground the trailer wiring?
A: Yes, proper grounding is essential for the trailer wiring to function correctly. An improper ground can lead to malfunctioning lights and other electrical features.
Q: How often should I check my trailer wiring?
A: It's good practice to check your trailer wiring each time you are planning to tow. Additionally, conduct a thorough inspection at least once a year.
Q: Do I need to worry about the length of the wire harness?
A: Yes, ensure the wire harness is long enough to accommodate turns without pulling on the connections, but not so long that it drags on the ground.
Q: Can my trailer wiring affect my vehicle’s electrical system?
A: Poorly installed or damaged trailer wiring can potentially cause issues with your vehicle’s electrical system. Always double-check your installation and follow best practices to minimize risks.
Disclaimer: These photographs, recommendations, and approximations are intended for demonstration purposes only and do not reflect the specifications of any particular tow vehicle, recreational vehicle, or trailer. Always consult the manufacturer’s Owner’s Manual.


